Xara Designer Pro X9 - First Look by Gary W. Priester
Photo Editing
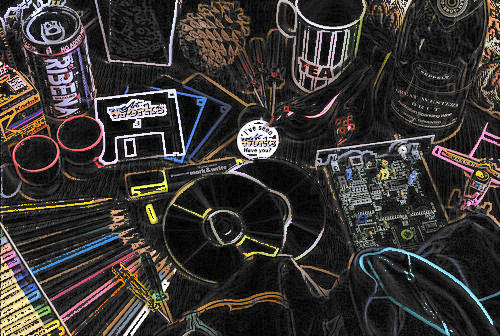
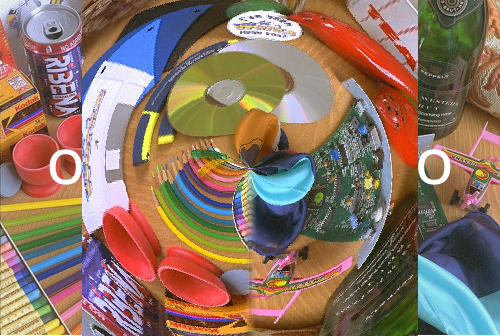
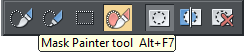
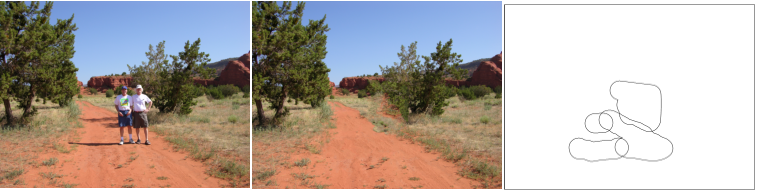
The first thing I should mention before we launch into the new Photo Editing tools is there has been some reorganizing of the fly out menus. In the example shown here, the reorganized Photo Tool fly out now contains the FX Tool for applying filters to images, and a new tool the Photo Heal Tool, which we’ll get to a bit later. Many of the fly out menus have also changed and I will cover some of these as we get to them. Mask and Region Tools Right below the Selector Tool (the arrow pointer) is the all new Mask and Region Tools fly out menu. Creating a region or a mask lets you isolate an area of a photo or vector object without effecting other areas in the photo or drawing. A Region lets you edit within the selection while a Mask protects the contents of the selection. The photo edits you make are non-destructive vector shapes, which means you can remove any photo edits by selecting the edited area (hold down the Ctrl key and click and press Delete). Or you can flatten the edits into a new bitmap (Arrange menu). The Region and Mask Tools let you create a selection with an adjustable sized brush or a pen (Region Tool only). Once you have created your Region or Mask, use the Photo Tool > Enhance options to adjust the Brightness, Contrast, Saturation, Color Temperature, Hue, and Sharpness/Blur. You can adjust the size of the Region Painter and the Shape Painter making it faster to paint/select a large portion of an area, then reduce the size of the brush for more detail. Or just zoom in and out and the nib remains the same size. The examples on the right indicate various regions and masks (the regions are defined by a dashed outline while masks are transparent pink areas). The Mask Painter Tool can also be used with the Content Aware Tool to preserve a portion of a photo. And there is special use of the Mask Tool which will be covered shortly. TIPS: If you hold down the Shift key, the operation switches to erase, so you can add to or remove areas of the Mask and Region as you draw. If you hold down the Alt key, you can stretch the operation in a straight line like a rubber band. Release the Alt key at the end of the straight line, then hold it down to start a new straight line. Hold down the Alt key and you can use your scroll wheel on your mouse to increase or decrease the size of the brush. Click here for more information on the Mask Tool and Region Tool. The Photo Heal Tool (the blue crossed band aids icon) is great for magically removing unwanted parts of a photo such as telephone wires, facial blemishes and wrinkles, scratches on photos, and a variety of other uses. It’s most effective if there is a clear contrast, such as the case of skin blemishes, or telephone wires against a blue sky. Sometimes, the Photo Heal Tool seems almost magical as in the example above. The two persons on the trail were detracting from the view, so I simply painted over them with the Photo Heal Tool and a few seconds later they were gone. The process is “non-destructive” which means the photo edits are made on top of the original photo. You can see the shapes I painted over the photo in the outline view on the right. You can delete any or all edits. If you are happy with the results, you can flatten the image, which creates a new bitmap, by selecting Flatten Photo Group from the Arrange menu. The Photo Healing Tool is associated with Magic Erase and when you brush over an area, the Magic Erase button is activated on the Infobar. If you are not happy with the first pass, press the Magic Erase button a few times until you are happy with the results. Click here for more details and examples. Background Erase Background Erase was introduced in Photo & Graphic Designer 9. It is similar to Designer Pro X’s Color Select/Erase with one major exception, Background Erase is 10 times better! In Designer Pro X, you select an area or several areas on a background and erase that range of colors. And it works pretty well if the area is solid, but there is still a bit of fringe left over around the edges. Background Erase does a much cleaner job. Here’s how it works:


FIRST LOOK By Gary W. Priester


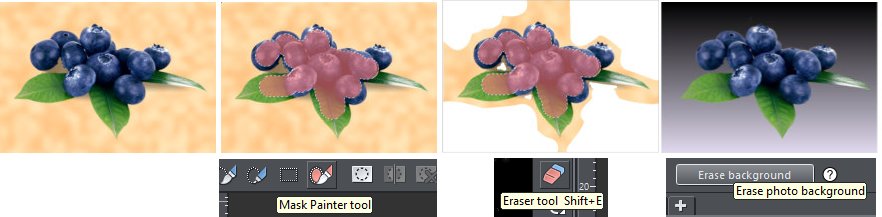
The original photo has a
mottled background.
Paint over the part of the
photo you want to preserve
using the Mask Painter
Tool. You do not have to
paint the entire area, just
paint over the colors you
want to preserve.
With the Eraser Tool, erase
some of the background. In
this case I also erased some
of the shadow. This indicates
the part of the image color
you want to erase.
Press Erase Background.
That’s it! The edges are
clean and sharp as shown
over a separate background..
Click here for more
information and to see
more examples.
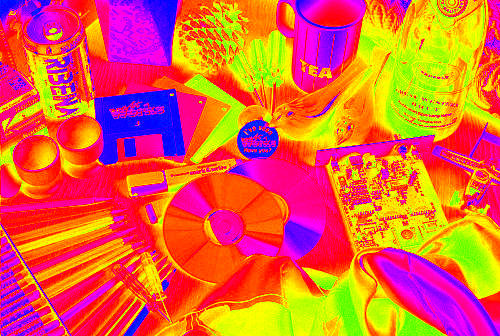
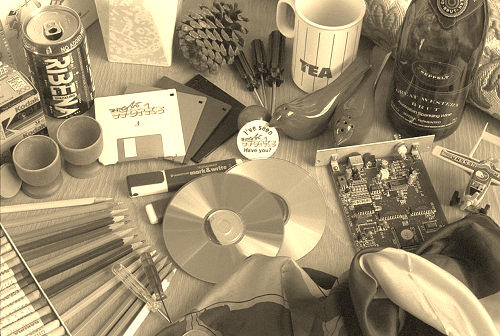
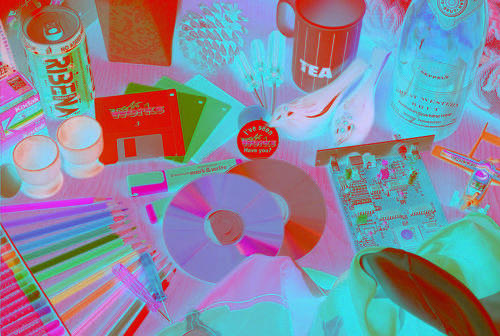
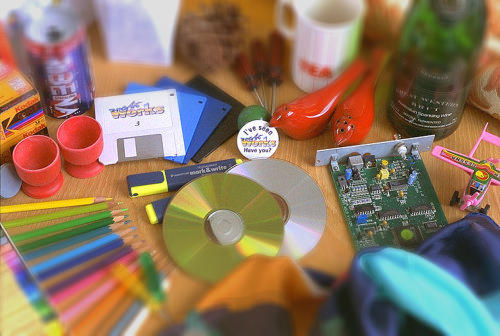
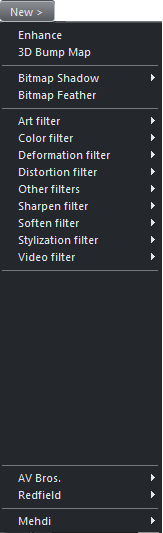
New Live Effects Filters The Live Effects Tool has moved into the Photo Tool fly out (see the
top of the page). And the icon has changed to FX, which is easier to remember. As I mentioned
earlier, 32-bit Photoshop compatible filters are not supported in the 64-bit version of
Pro X9. But there is a brand new suite of filters that work in both the
32 and 64-bit versions (Fake HDR through Thermal). In most cases,
each of these new filters has many variations.

NEW
FILTERS!
32 & 64-bit


Click here for more information on the New Live Effects and to see
more examples (bottom half of the page).

Mouse Over the Menu Names to See the Results of the 11 Filters

32-BIT
FILTERS

32-BIT
FILTERS


Xara Products
Xara Products
Legal & Contact Info
About The Xara Xone
Where content is provided by third parties, the copyright holder is indicated. Trademark notice.