
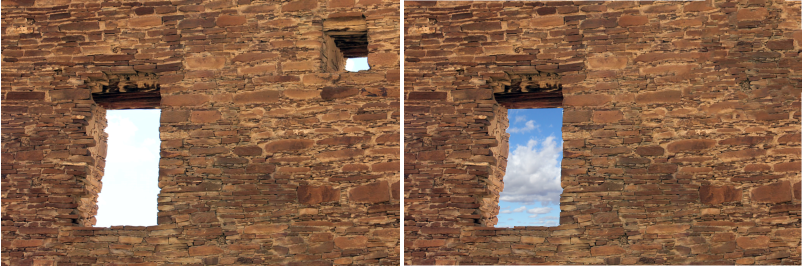
In the example above, I used the Photo Heal Tool to remove the small window in the
upper right side of the stone wall. I created a mask with the Mask Painter Tool over
the larger window, deleted the masked portion of the photo, and added a more vibrant
sky which is actually placed behind the image and showing through the window.
The Photo Heal Tool
The Photo Heal Tool is great for magically removing unwanted parts of a photo such as telephone wires, facial blemishes and wrinkles, scratches on photos, and a variety of other things. It’s most effective if there is a clear contrast, such as the case of skin blemishes, or telephone wires against a blue sky.
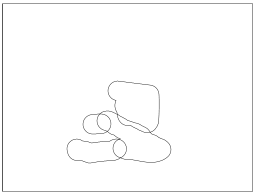
In the example shown above, the two tourists in the photo were detracting from the
natural beauty of the scene. A few strokes of the Photo Healing Tool later, the
tourists were gone and the pristine landscape restored.
Like the Mask and Region tools, edits made to an image are non-destructive. The edits
are added over the photo instead of directly onto the photo itself. The outlined shapes
above right, show the four areas that were painted onto the photo to remove the
tourists. These can be selected (hold down the Ctrl key and click to select), and
deleted. If you are happy with the results and do not want to accidentally delete your
edits, select Flatten Photo Group from the Arrange menu.
You’re probably wondering, how does this work? As near as I can tell, the Photo Heal
Tool (and the Magic Erase Tool) looks at the surrounding areas outside your
selection and then attempts to
randomly reproduce the area.
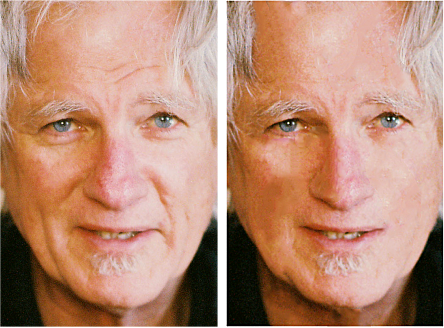
I don’t look as young as I
used to. But with the help of
the Photo Heal Tool I was
able to remove the puffiness
under my eyes, remove a few
wrinkles and stray hairs, and
make myself look at least 3
years younger. It’s magic!
TIP: Because the Photo
Heal Tool is tied into the
Magic Erase function of the
Clone Tool (Photo Tool fly
out menu), you can press the Magic Erase button on the Infobar and cycle through
various erase options. You can toggle back through the changes by pressing Ctrl Z.


The Photo Heal Tool was used to remove the balloon and the dark area in the
landscape. It’s pretty incredible when it works, as I stated previously. It does not
always work the way you think it will. But when it does, it’s way cool. I think the
algorithm used to identify the object to erase, looks for the most obvious objects or
areas and then borrows from the surrounding areas. Strong contrast works best.
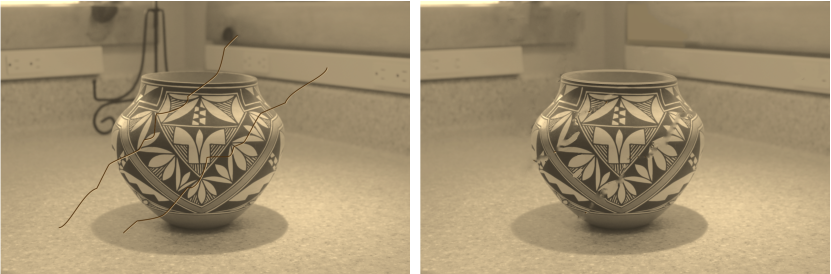
I tried to simulate some creases in the photo on the left. I removed the metal plate
holder fairly well, and the scratches over solid areas healed better than the scratches
over the patterns on the pot. I also used the Shape Painter Tool (covered later) to
add back some of the areas that did not erase cleanly. Not perfect by any means, but
with a little more time and effort, I could make it perfect.


Xara Products
Xara Products
Legal & Contact Info
About The Xara Xone
Where content is provided by third parties, the copyright holder is indicated. Trademark notice.