
Xara Products
Xara Products
Legal & Contact Info
About The Xara Xone
Where content is provided by third parties, the copyright holder is indicated. Trademark notice.


X a r a W e b D e s i g n e r 9 — F i r s t L o o k
New Support for Retina® Displays (HiDPI) Apple did our eyeballs a favor when they developed the Retina
quality display, so called because the human eye cannot discern any pixels. Text is a good example.
Windows screen resolution is 96 pixels per inch. This may seen like a lot of pixels but the text you are
reading here relies heavily on anti-aliasing (using intermediate colored pixels to smooth the rough edges
of the characters), which give the impression of sharp text. But if you could double the resolution to 192
pixels per inch, which is Retina resolution, your text, even at very small sizes will look 200% better.

96dpi
192dpi
Photos will look 200% sharper on Retina quality displays. And this does not just include Apple products.
Most high end tablet and mobile phones currently have or will have Retina quality resolution very soon. To
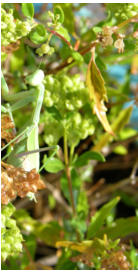
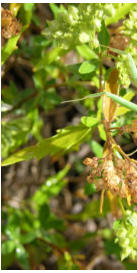
this end, Web Designer 9 will optimize all photos at 192ppi (this is the same as dpi). I optimized my Praying
Mantis photo above at 96 and 192ppi. On most monitors there will not be a difference, but if you are
viewing this page on a Retina quality display, the part of the image on the right will look very clean and
crisp, but by comparison the image on the left will appear softer and not as clean and crisp.
Once again, the only thing with which you the web designer need
concern yourself is the resolution of your image. Web Designer 9
will do the rest. Two versions of your photos will be published, at
two resolutions, 96 and 192ppi. The browser or mobile device will
load the appropriate images. As you can see on the left, the Retina
quality image is designated @2x. My iPad 3 will load the @2x
version. Firefox will load the other.
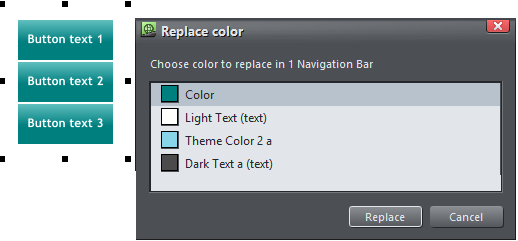
Recolor My World In the past, changing a color on a navigation bar was not an easy thing to do. Replacing
a button color in a navigation bar
such as the one shown here
required at the very least, holding
down the Ctrl key while clicking on
the button shape or text. And this
only worked with visible buttons.
Here’s how it works now: Drag a
color from the screen palette, or a color you have
mixed in the Color Editor, and drop it onto the
navigation bar. A dialog appears with options to
replace the visible color of
the button or the text (the MouseOver portion that covers the MouseOff button),
as well as the hidden MouseOff button color and text. (This can be used with
grouped objects as well as navigation bars).
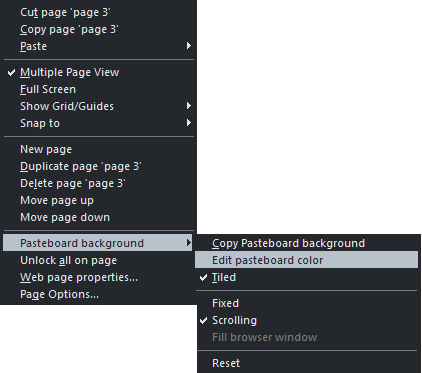
And, it doesn’t stop here. If you use a Page or Pasteboard Background Color or
texture, you can change this just as easily. You can drag and drop a color onto
the page or pasteboard or right click on the page or pasteboard and select Edit
Page (or Pasteboard) Color. If you don’t like the changed color, simply press the
Undo arrow icon, or select Undo from the Edit menu and repeat this step.
One word of caution, if you replace a Theme Color
or a Named Color it changes the color to a “local”
color and loses its Theme Color properties.
Google Analytics Google Analytics is free and is an
invaluable resource for tracking traffic to your site. Or
better still your client’s website. It’s like a hit counter
on steroids. You can track your visitors by browser type,
country, language, computer, as well as the pages
visited, how the visitor found your site, or how long she
or he stayed on your site.
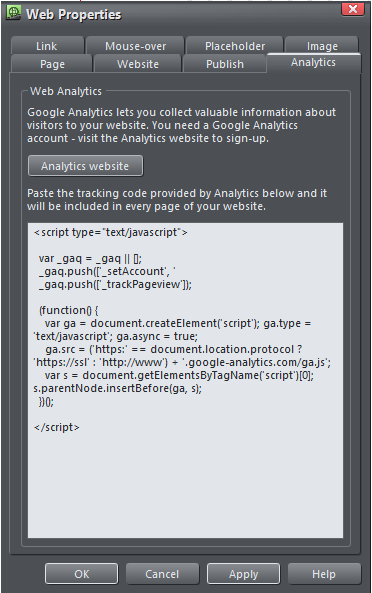
Web Designer 9 has made adding this service to your
entire website about as easy as falling off a log. A new
tab in the Web Properties menu takes you to the
Analytics section. Click Analytics Website and either
sign in or sign up, generate a tracking code for your
website, copy the code and then paste it into the
tracking code window.
Click Apply, then OK. Did I tell you it was easy?
Give Google about 24 hours to index your site and then
go to your Google Analytics page in your browser to
take in the wealth of free information.
Simplified Publishing MAGIX is making you an offer
you can’t (or shouldn’t) refuse. A free web hosting
account with 500MB of disc space for Web Designer 9
Classic users or a whopping 2GB for Web Designer 9
Premium users!
OK, that’s very cool, but there’s more!
If you’re like me, all that FTP stuff you have to enter
gets really confusing, not to mention having to track
down all this information whenever you publish a new
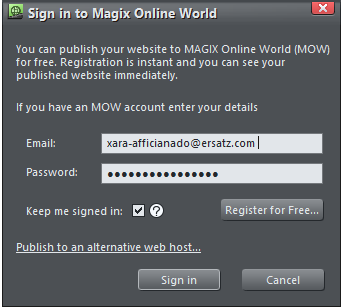
site. Well, how easy is this: Register for your free
MAGIX Online World account with your email address
and password. It takes about a minute. And you’re
ready to publish. You are as they say, good to go.
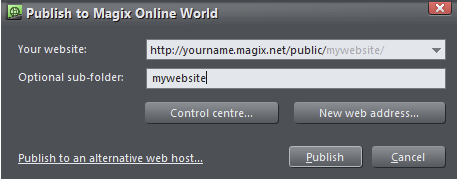
As soon as you are ready to publish to
MOW (MAGIX Online World) enter your
website URL, optional sub-folder, and
press Publish. All of the FTP settings are
done for you. All you have to do is sit
back and watch the little progress
indicator at the top right speed to finish.
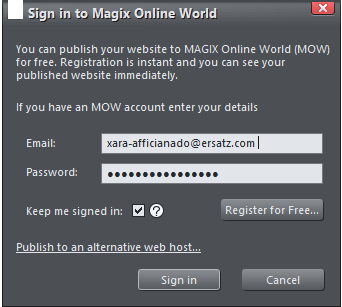
And as soon as your site is published
this little dialog appears with a link to
your published site. Simple? Simple!

FREE MAGIX Online World “M” Hosting Option For one year, Premium users get a free MAGIX Online
World “M” hosting package. This includes a free domain name, free e-mail account for your domain
name, plus 5 different mail boxes. So if your domain name is myspiffywebsite.com, then your email could
be el-jeffe@myspiffywebsite.com. And you could also have info@myspiffywebsite.com,
support@myspiffywebsite.com, dave@myspiffywebsite.com etc. It’s a great deal and worth £1.99 ($3.00) a
month. And this is a great price for a domain name, web hosting and domain related e-mail even if you
had to pay for it.
Visible Colors
Hidden Colors